一、创建DashboardView.vue界面
这个我没有全听,就是复制过来了,大致理解了 p28-29
1. 布局
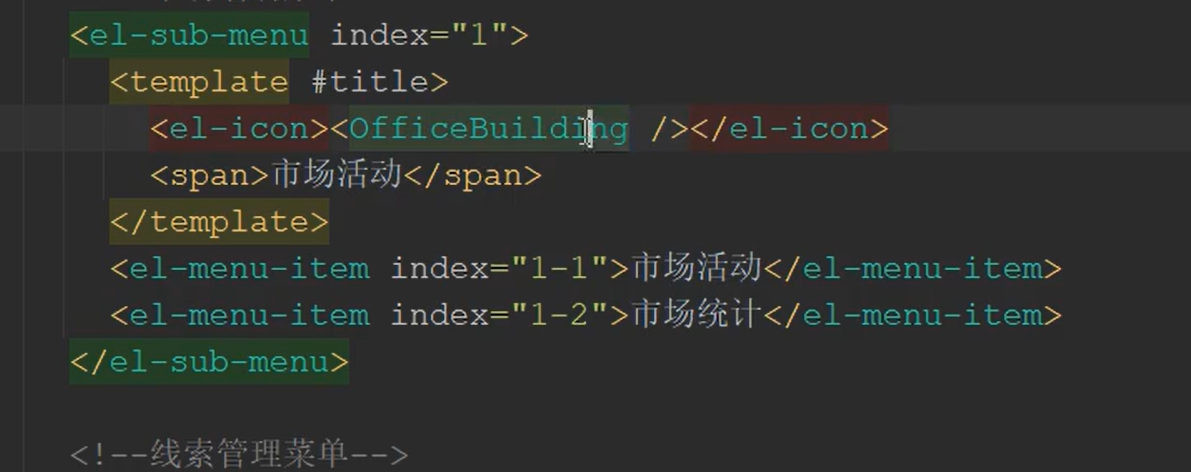
2.菜单制作
1
2
3
4
5
6
7
8
9
10
11
12
13
14
15
16
17
18
19
20
21
22
23
| <el-menu
active-text-color="#ffd04b"
background-color="#334157"
class="el-menu-vertical-demo"
:default-active="currentRouterPath"
text-color="#fff"
style="border-right: solid 0px;"
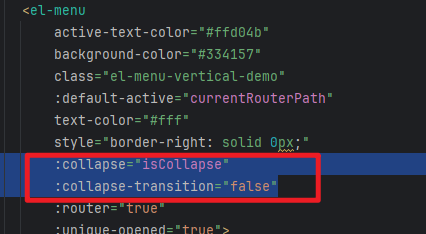
:collapse="isCollapse"
:collapse-transition="false"
:router="true"
:unique-opened="true">
<el-sub-menu :index="index" v-for="(menuPermission, index) in user.menuPermissionList" :key="menuPermission.id">
<template #title>
<el-icon><component :is="menuPermission.icon"></component></el-icon>
<span> {{menuPermission.name}} </span>
</template>
<el-menu-item v-for="subPermission in menuPermission.subPermissionList" :key="subPermission.id" :index="subPermission.url">
<el-icon><component :is="subPermission.icon"></component></el-icon>
{{subPermission.name}}
</el-menu-item>
</el-sub-menu>
</el-menu>
|
3.菜单加入图标/美观
(1) 安装图标
npm install @element-plus/icons-vue –save
(2)注册所有图标,在main.js中注册:
1
2
3
4
5
6
7
8
9
10
11
12
13
14
15
16
17
18
19
20
| import { createApp } from 'vue'
import App from './App.vue'
import ElementPlus from 'element-plus'
import 'element-plus/dist/index.css'
import router from './router/router.js'
import * as ElementPlusIconsVue from '@element-plus/icons-vue'
let app = createApp(App);
for (const [key, component] of Object.entries(ElementPlusIconsVue)) {
app.component(key, component)
}
import loginView from "./view/LoginView.vue";
app.use(ElementPlus).use(router).mount('#app')
|
(3)使用图标,复制图标的代码,粘贴到项目中即可;
Icon 图标 | Element Plus (gitee.io)
Vue中:
1
2
3
| $refs 拿到页面上ref属性的那个dom元素;
$router vue路由对象,里面提供了一些方法供什么使用;
|

(4)添加图标的动作
1
| <el-icon class="show" @click="showMenu"><Fold /></el-icon>
|
1
2
3
4
5
| methods : {
showMenu() {
this.isCollapse = !this.isCollapse;
},
|
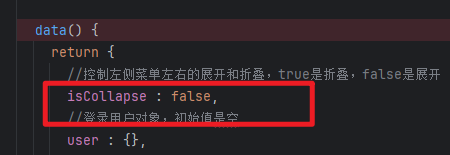
isCollapse定义

设置变量:

调整宽度

4.加入下拉菜单、vue函数钩子
函数钩子:就是在渲染页面的时候,就把用户的名字等信息获得到,然后再渲染到页面当中去
(1)写script
1
2
3
4
5
6
7
8
| 写script
//vue的生命周期中的一个函数钩子,该钩子是在页面渲染后执行
mounted() {
//加载当前登录用户
this.loadLoginUser();
this.loadCurrentRouterPath();
},
|
(2)写templete 显示
1
2
3
4
5
6
7
8
9
10
11
12
13
14
15
16
17
18
19
20
| 写templete 显示
<!--右侧:上-->
<el-header>
<el-icon class="show" @click="showMenu"><Fold /></el-icon>
<el-dropdown :hide-on-click="false">
<span class="el-dropdown-link">
{{ user.name }}
<el-icon class="el-icon--right"><arrow-down /></el-icon>
</span>
<template #dropdown>
<el-dropdown-menu>
<el-dropdown-item>我的资料</el-dropdown-item>
<el-dropdown-item>修改密码</el-dropdown-item>
<el-dropdown-item divided @click="logout">退出登录</el-dropdown-item>
</el-dropdown-menu>
</template>
</el-dropdown>
</el-header>
|
(3)写方法
1
2
3
4
5
6
7
8
9
10
11
12
13
14
15
16
17
18
19
20
21
22
23
24
25
26
27
28
29
30
31
32
33
34
35
36
37
38
39
40
41
42
43
44
45
46
47
48
| 写方法!
methods : {
showMenu() {
this.isCollapse = !this.isCollapse;
},
loadLoginUser() {
doGet("/api/login/info", {}).then( (resp) => {
  console.log(resp)
  this.user = resp.data.data;
})
},
logout() {
doGet("/api/logout", {}).then(resp => {
if (resp.data.code === 200) {
removeToken();
messageTip("退出成功", "success");
window.location.href = "/";
} else {
messageConfirm("退出异常,是否要强制退出?").then(() => {
removeToken();
window.location.href = "/";
}).catch(() => {
messageTip("取消强制退出", "warning");
})
}
})
},
loadCurrentRouterPath() {
let path = this.$route.path;
let arr = path.split("/");
if (arr.length > 3) {
this.currentRouterPath = "/" + arr[1] + "/" + arr[2];
} else {
this.currentRouterPath = path;
}
}
}
|
==下面这个调用的就是httpRequest.js里面的doGet的axios==
doGet("/api/login/info", {}).then( (resp) => {
console.log(resp)
this.user = resp.data.data;
})
!!**==因此要写后端的接口==**,UserController
5.获取登录人信息后端代码实现


(1)编写UserController.java
1
2
3
4
5
6
7
8
9
10
11
12
13
14
15
16
17
18
19
20
21
22
23
24
25
26
27
28
29
30
31
|
package com.bjpowernode.web;
import com.bjpowernode.model.TUser;
import com.bjpowernode.result.CodeEnum;
import com.bjpowernode.result.R;
import org.springframework.security.core.Authentication;
import org.springframework.web.bind.annotation.GetMapping;
import org.springframework.web.bind.annotation.RestController;
@RestController
public class UserController {
@GetMapping(value = "/api/login/info")
public R loginInfo(Authentication authentication){
TUser tUser = (TUser)authentication.getPrincipal() ;
return R.OK(tUser);
}
}
|
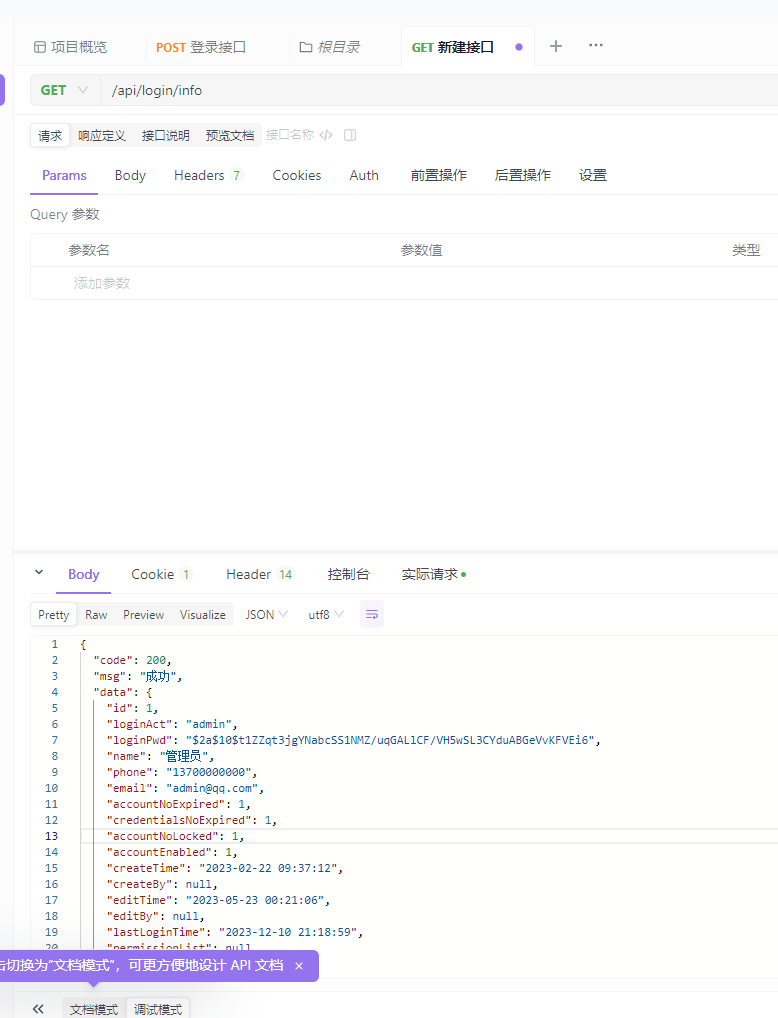
(2)apifox测试成功

(3)前台调用测试
没改 嗯,不一定能成
二、用JWT替换sessionP36


